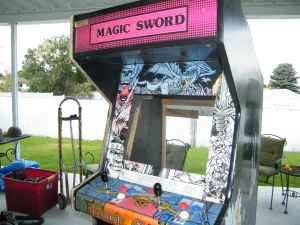
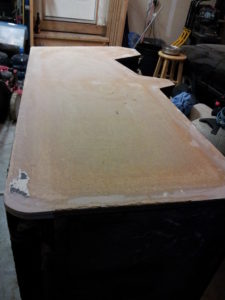
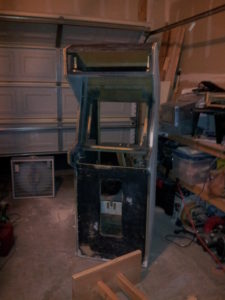
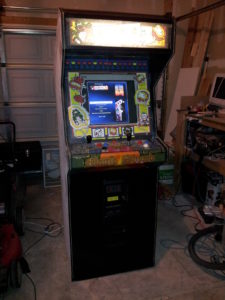
Somewhere around October of 2012 I was looking for a new project and found a beat up old Dig Dug Arcade Cabinet on Craigslist. It had been converted into a Magic Sword at some point in its life and was now mostly gutted and in pretty rough shape. Dings, dents, and water damage, but the bones seemed pretty solid and the price was right. Added bonus- it came with monitor glass, marquee (plexi)glass, and a control panel. The original side art was still there, but in pretty rough shape and hiding under 20 years worth of heavy black paint.
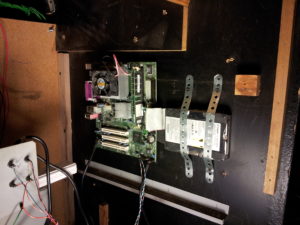
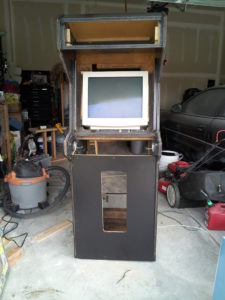
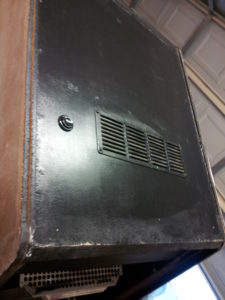
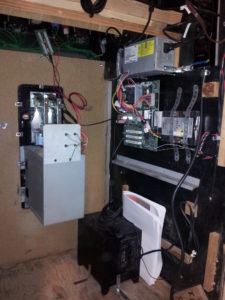
I got it home and stripped the old paint and crap from sides (couldn’t save the original art unfortunately) and wired the control panel up to an I-PAC USB arcade control interface board. The donor PC is an old 1.8ghz Celeron with 512MB RAM and a 20GB Hard drive; this doesn’t even come close to running new or modern games, but it does great with MAME and the ~250 old 2-button games I’ve installed. As the original circuit boards were long gone, I had plenty of room to mount the computer to the side wall. At this point it was playable, just not very pretty. And winter was starting in with a vengance, so I had to leave it as it was.

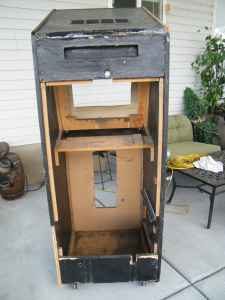
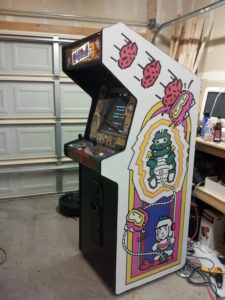
I got back to working on it in April of 2013- this was about the earliest I could be out in the garage for more than 15 minutes without my fingers freezing. The next step was sanding- lots and lots of sanding. Most of the edging needed repair, bottom corners were all trashed, and part of the side panel near the control panel had been busted off and repaired with what looked like drywall mud. Eventually I had it stripped, sanded, all unwanted holes filled, and Bondo repairs complete. Put on a fresh coat of flat black paint and it was starting to look pretty awesome.
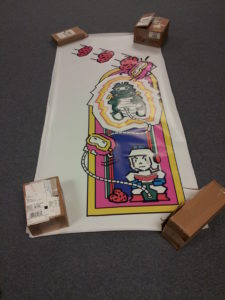
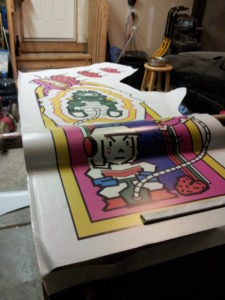
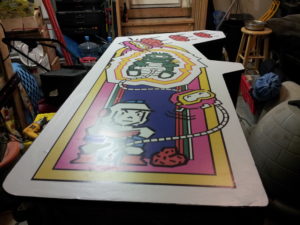
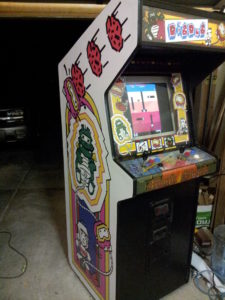
I ordered a new set of sideart- They’re basically just stickers… giant, expensive vinyl stickers. I was pretty apprehensive about installing the new sideart because they’re friggin huge and I didn’t want to screw up. I think I watched every sideart instruction video on YouTube, but they actually went on really smoothly and I’m pretty happy with the way it all turned out. The new T-Molding looks great, too.
Everything is plugged into one of those smart power strips so the monitor, marquee, and speakers all power up and shut down when the PC does. Added a power button on top – no mucking around behind or inside the cab to fire it up. I didn’t feel like messing with a 20 year old fluorescent transformer, so I replaced the marquee lighting with some of those 12 volt strip LED’s.
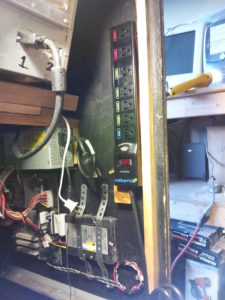
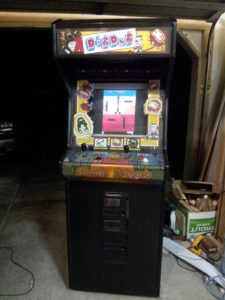
I chose a game selection menu called MaLa, it’s both lightweight and fairly straightforward to set up. Some awesome person out there on the internet put together some MP3s of random arcade noise, and I’ve got it set to play those automatically. Coin door is installed and wired to the I-PAC controller. It’s pretty awesome dropping in quarters in and playing games on an actual arcade cabinet! By the way- this thing holds a ton of quarters, best piggy bank ever 😉
Completed (mostly) in August of 2013; I’m still planning to replace the Control Panel art, and build a mask to hide the monitor edges, and there’s always something to tweak or improve, but it’s essentially finished. It looks great, is fun to play, and is completely awesome.
It IS completely awesome!! My kids and I all agree
whoah thgis blog is excellent i love studying your posts.
Stay up the good work! You recognize, a lot oof people are searching around for this
info, you could help them greatly.
body piercing
Nice post. I was checking constantly this blog and I’m
impressed! Very useful information particularly the last part 🙂 I care for such information much.
I was seeking this certain info for a very long time.
Thank you and good luck.