It’s Tiny! It’s Awesome! It Plays Great!
– and –
It’s… not quite finished yet…
Looking back through my notes, I’m a little embarrassed to see that I started this project in March of 2015… and finally just finished it now… May 2019. July 2019. posting the unfinished pics now to motivate myself to get a move on!
Longest. Build. Ever.
I think I have too many projects 🙂
When I got the idea for this 3/4 size arcade cabinet, there weren’t many others out there. Digging through arcade forums, you’d see the occasional post from someone building a tiny arcade for their kid, but they were few and far between. Mostly searches for mini arcade would turn up those terrible handheld games in platic molded to look like an arcade cabinet. Now there are mini arcades everywhere you look- Youtube videos, mainstream websites, they’re are even some you can buy at Walmart- they’re flimsy garbage and the electronics and controls are pretty poor quality, but they’re cheap and very accessible.
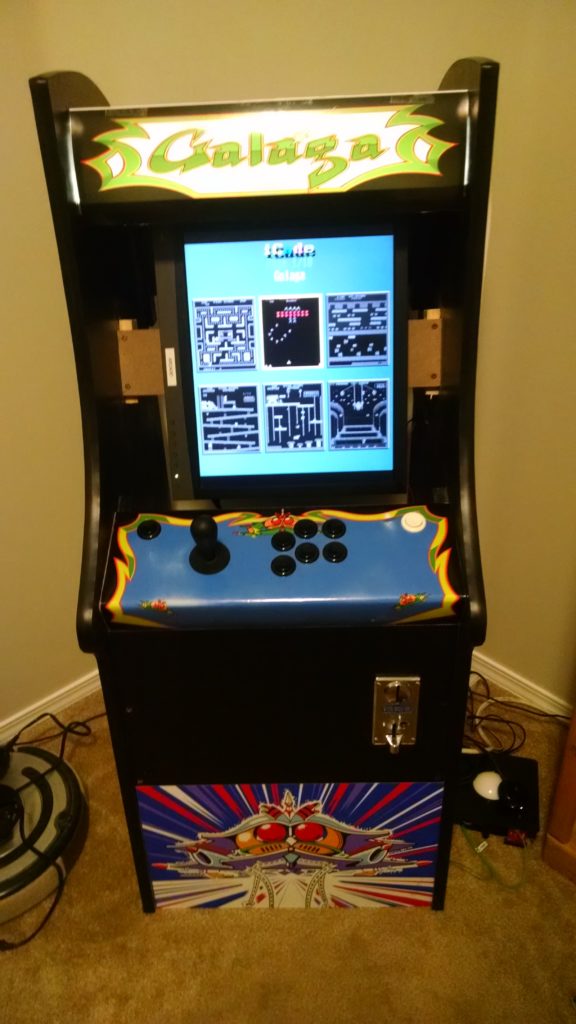
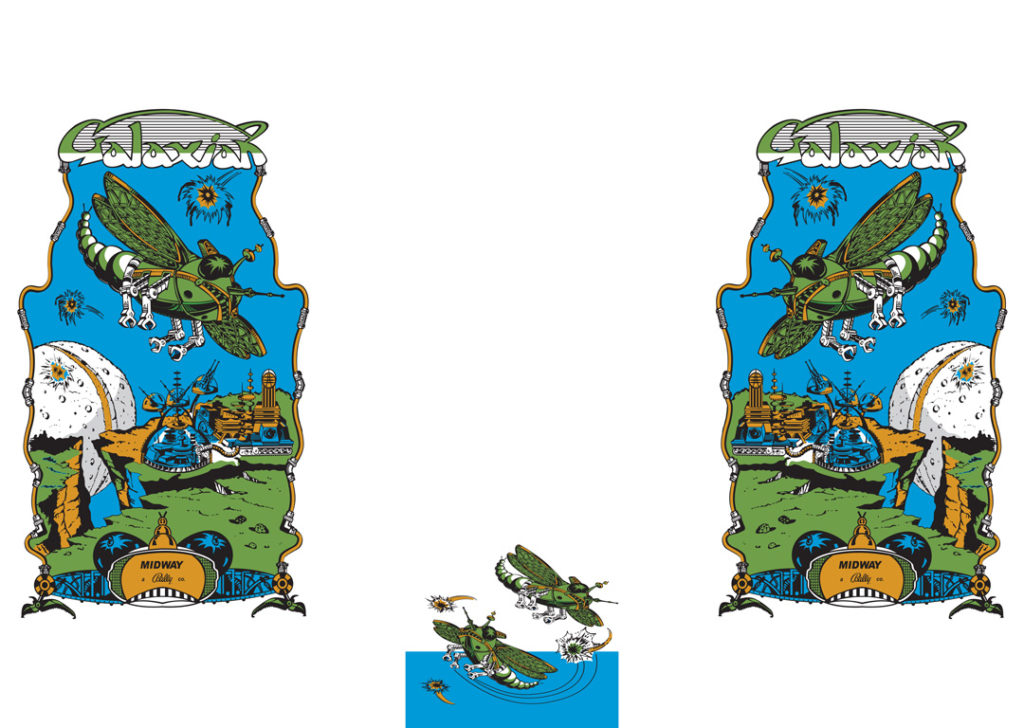
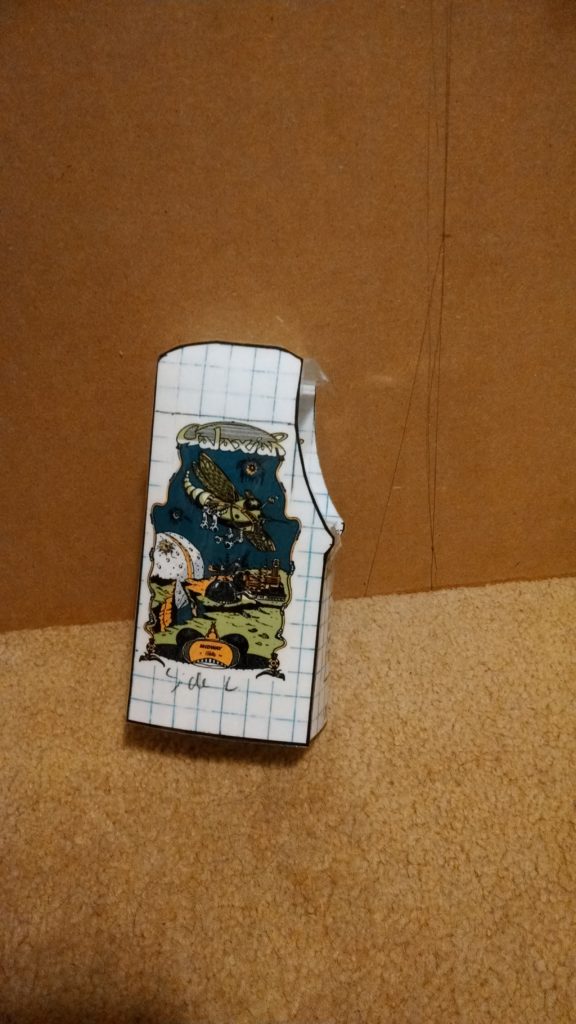
This was originally going to be a Galaxian themed cabinet, but then I remembered that Galaxian sucks and Galaga was what I had actually been thinking of anyway. So my initial sketches and mockups are all galaxian themed, but the actual build is much cooler.
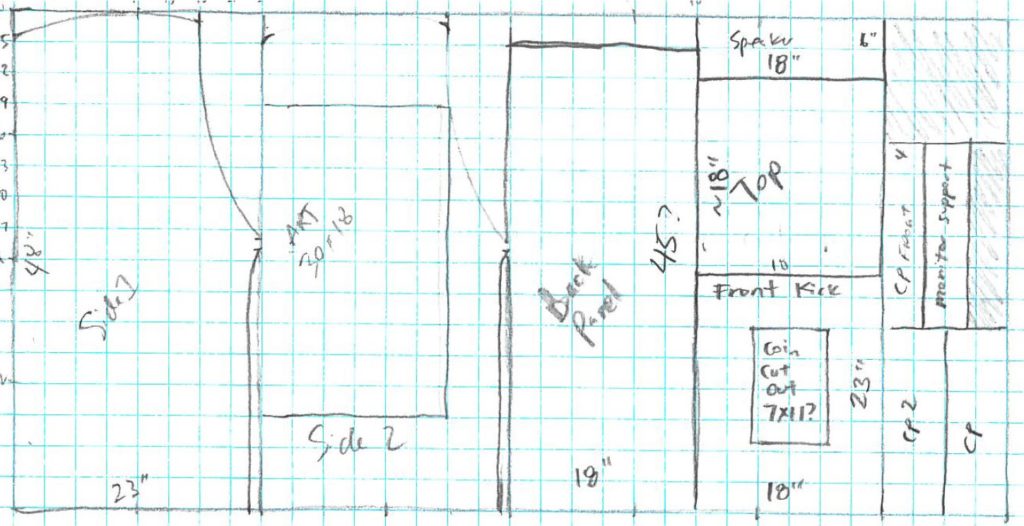
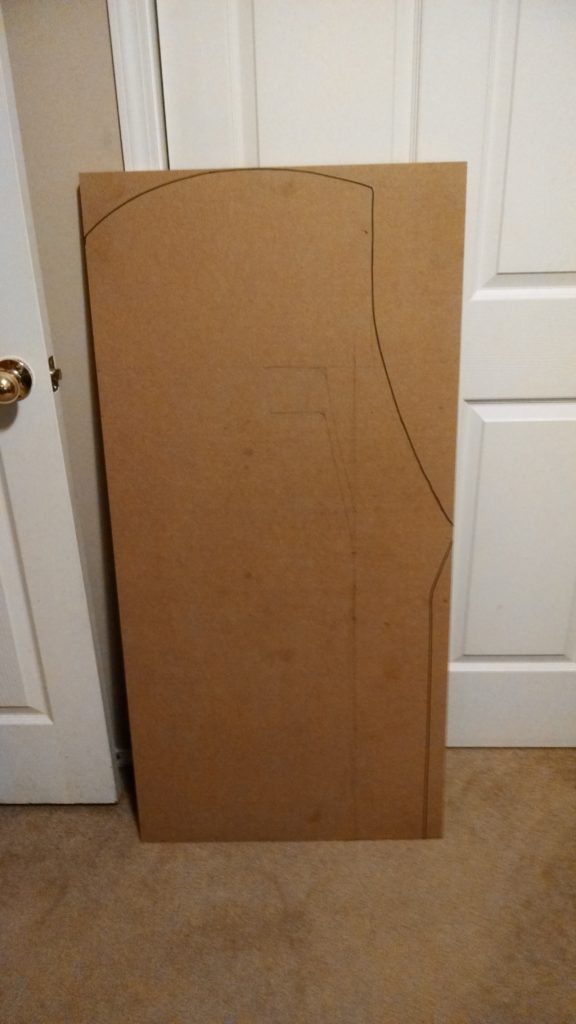
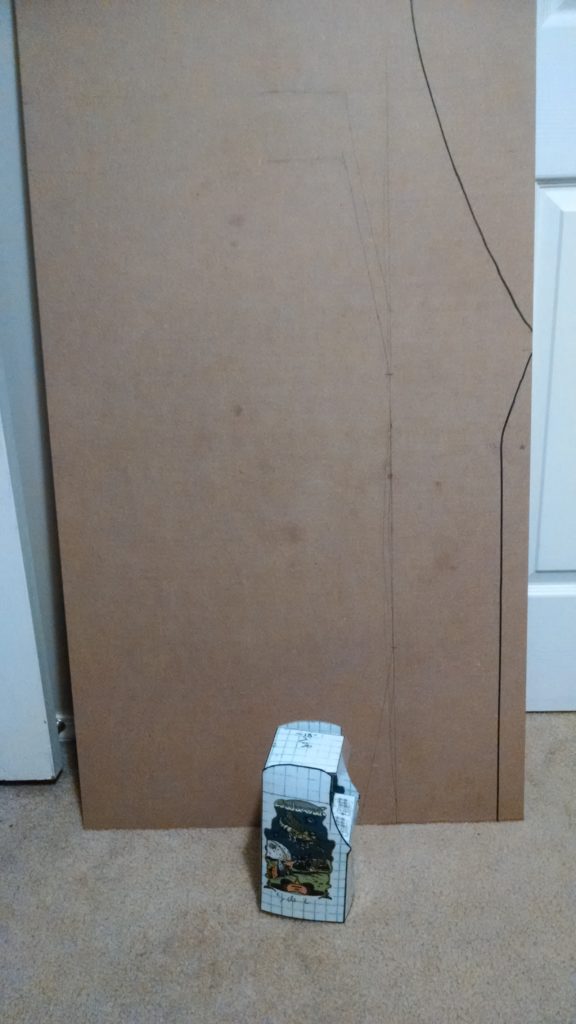
The Cabinet
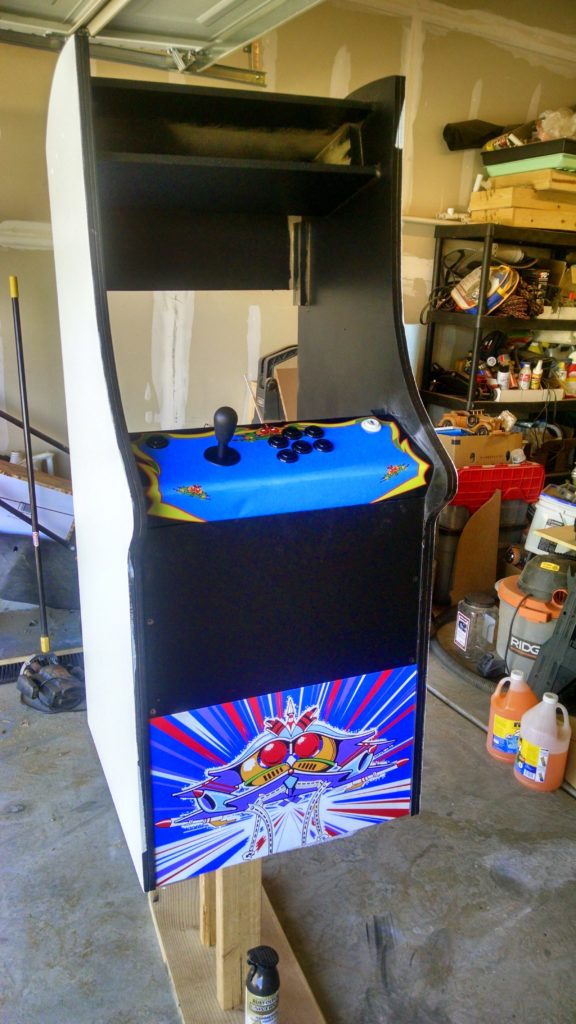
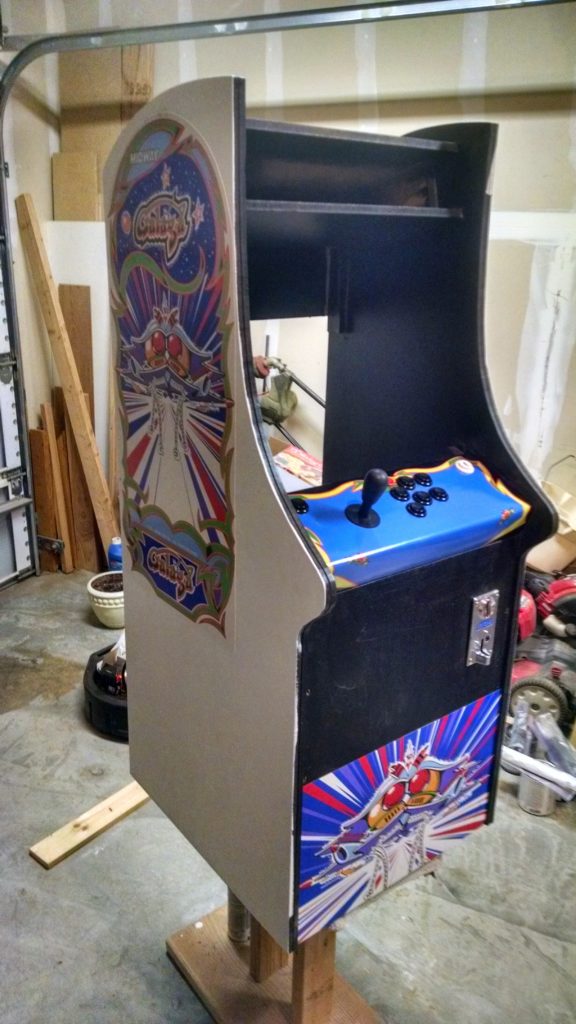
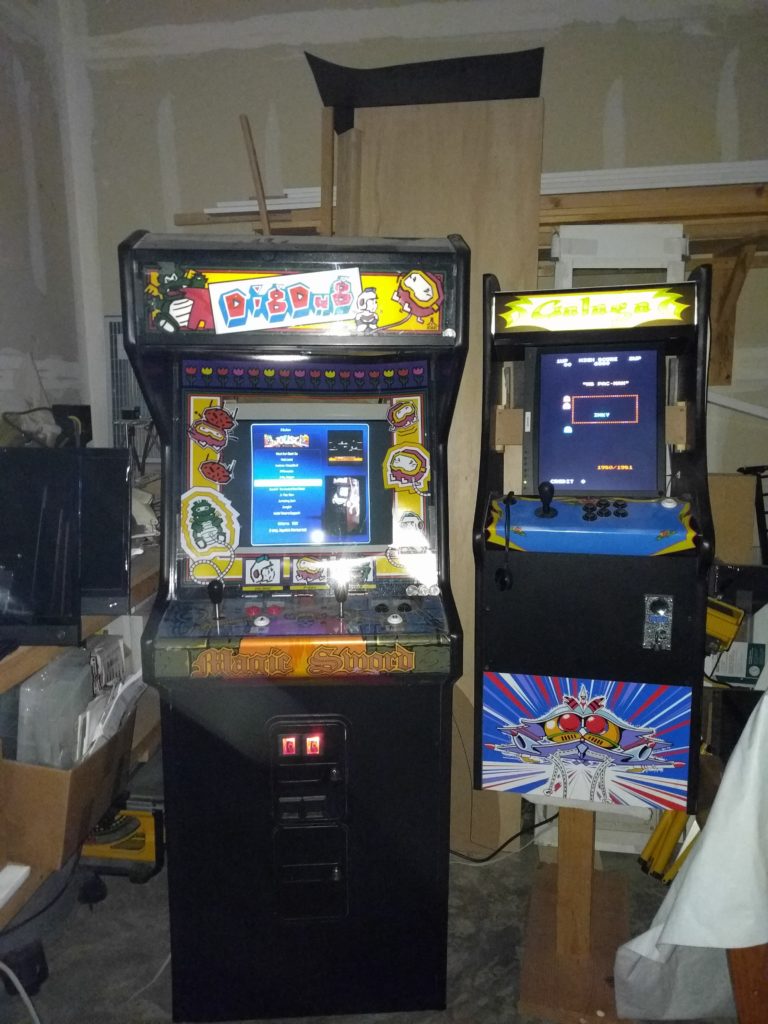
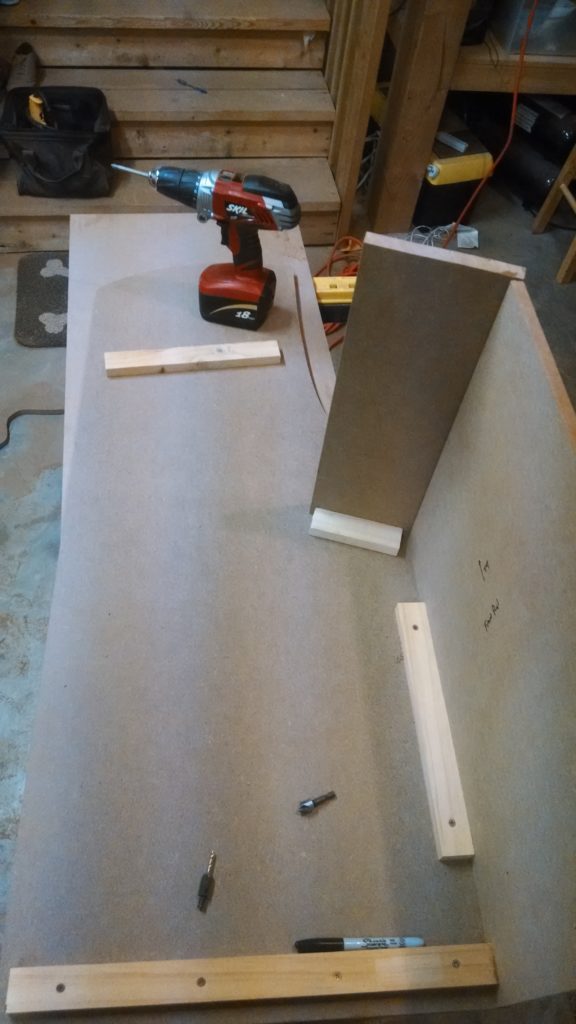
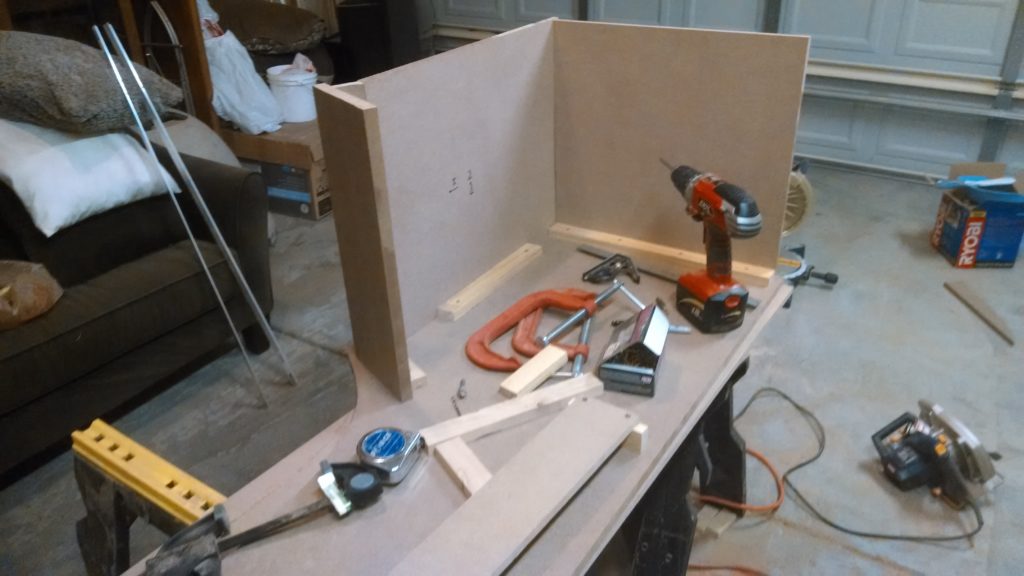
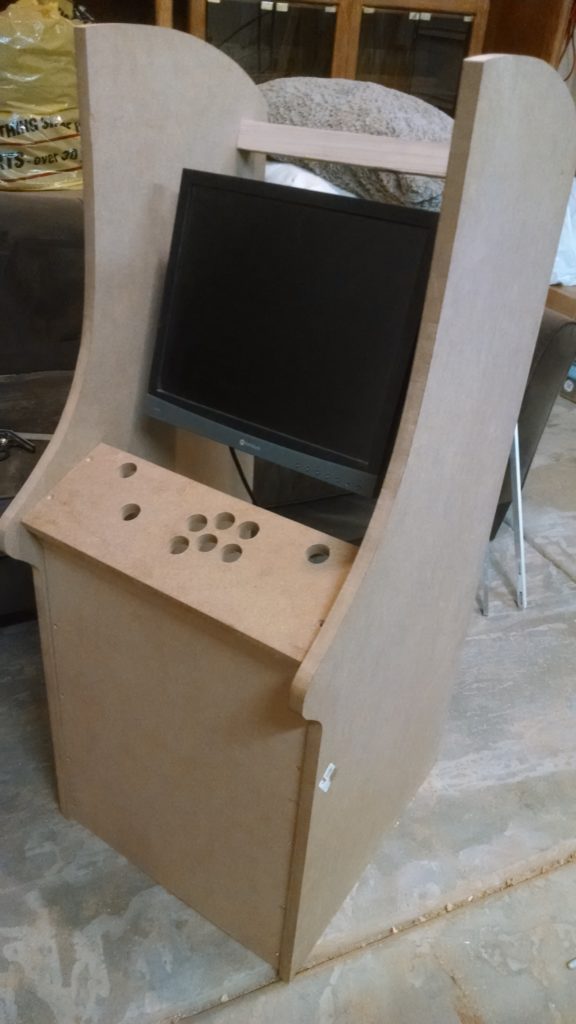
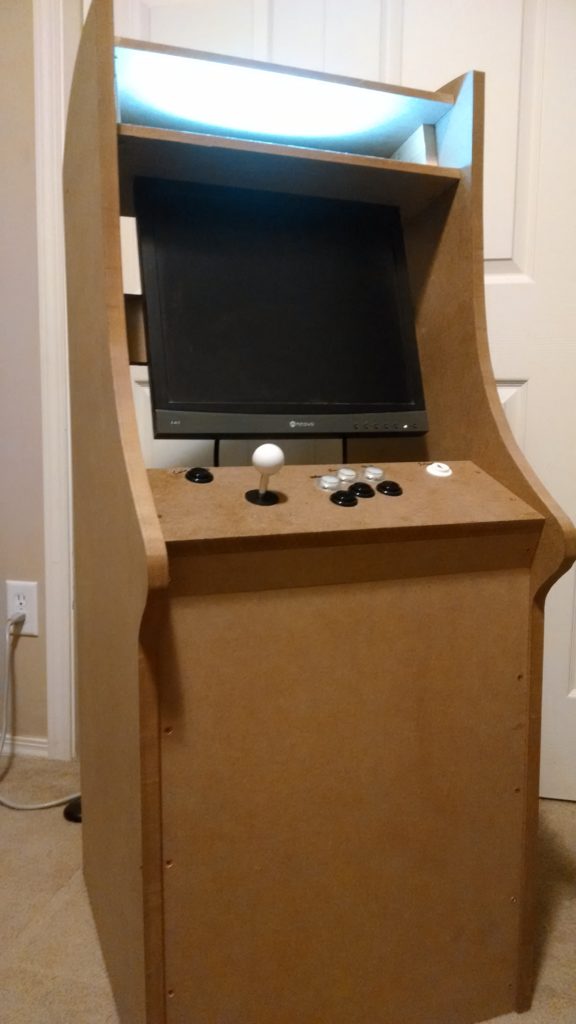
I designed this cabinet at 73% scale so the profile would fit on a 2′ x 4′ sheet of MDF. Seemed a good size for playability and I can actually fit materials that size in my car. I used 3/4″ MDF for the sides- partially because it looked right and partially because I had a bunch of 3/4″ T-Molding left over from the Dig Dug restoration. The cabinet is 18″ wide (because standard width is ~24″) panels are all 1/2″ MDF, stringers are 1×2 strips
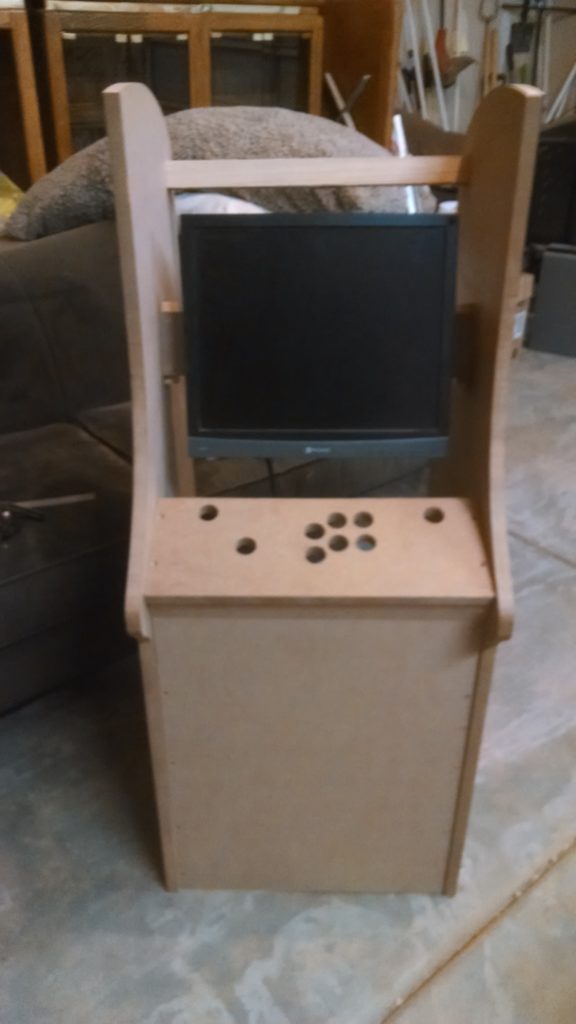
Cabinet profile is very similar to, but not a direct copy of the classic Midway Galaga cabinet. The top arc is a little tighter and the control panel bump is more rounded over. I also wanted the monitor to be positioned more vertically instead of in plane with the control panel. With the sizing/angles/ergonomics, this monitor config made more sense.

The Hardware
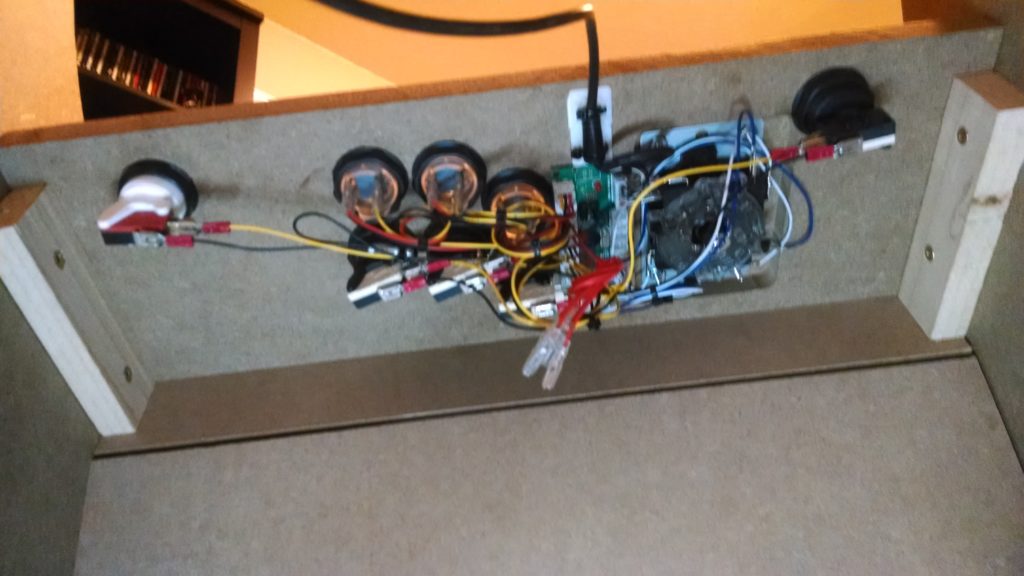
The cabinet is running one of those 60-in-1 multi game boards. Sure some online reviewers like to whine that the emulation isn’t quite perfect, it’s running a really old hacked version of MAME, and the sound isn’t perfect. But it does do its job decently, it’s stupid easy to install and get up and running, and it’s really not bad. It’s got a good selection of classic games, they all play pretty well, I haven’t noticed any input lag, and it runs very stable (only time it’s crashed is when I’ve been fiddling with the power connection). I may still replace it with a better Raspberry Pi / MAME solution, but this is fun to play as is and feels plenty good for now.
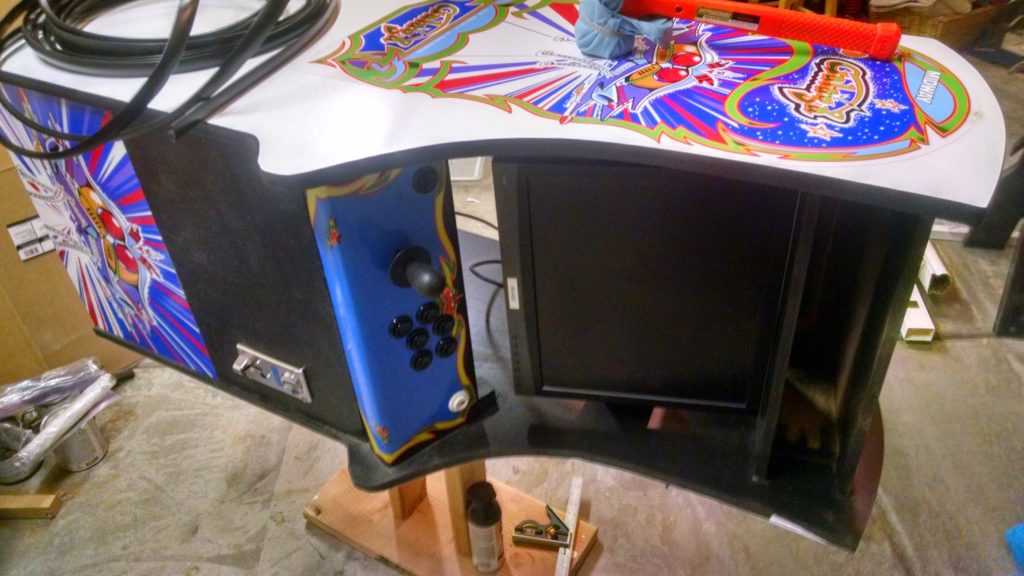
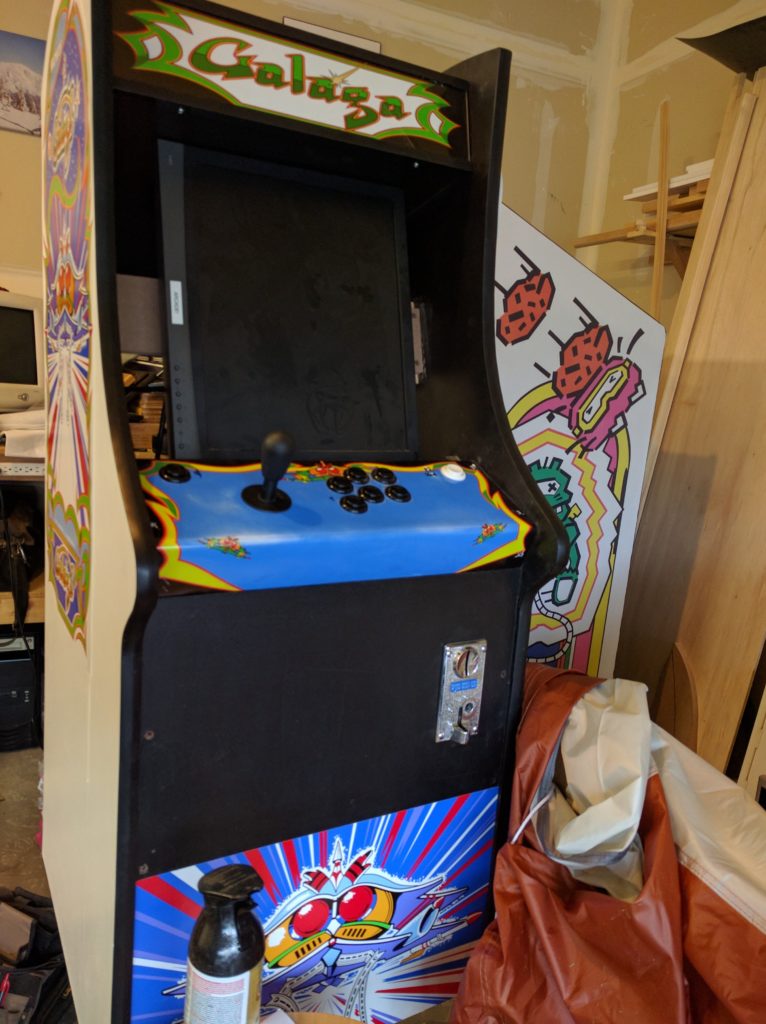
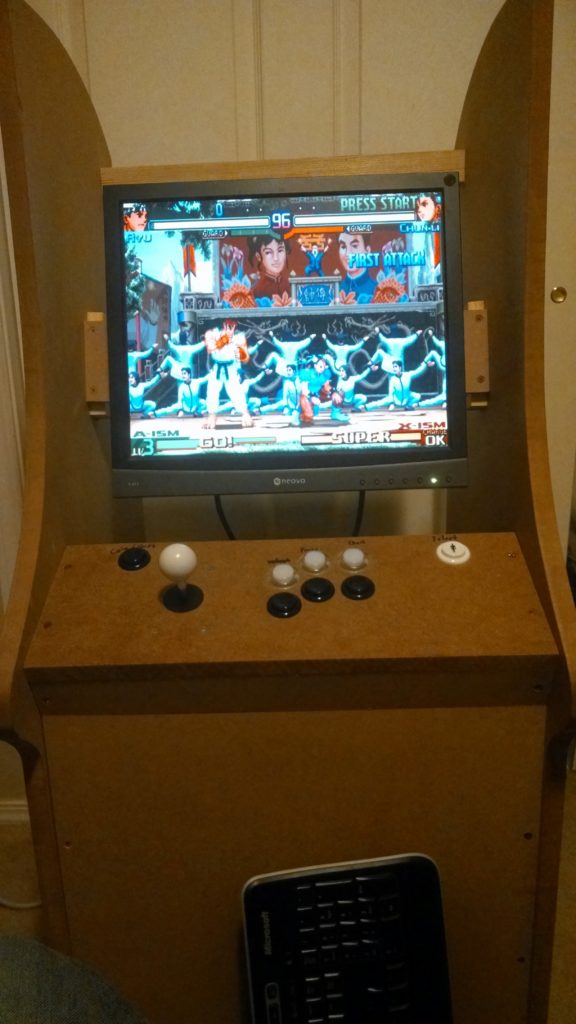
Screen is an old 17″ LCD mounted vertically. I ran a support across the cabinet behind the monitor and just used the VESA mounting holes to bolt it in place. Easy peasey. Connects to the 60-in-1 board through a standard VGA connector.
The Coin Mechanism was a little weird. I was going to use the regular black steel panel with door type coin mech, but the Chinese ebay seller screwed up and sent this type and I didn’t want to hassle with trying to exchange. Instead of just hooking up signal and ground to a regular button input, this coin mech needed a 12v power connection and a diode inline along with the signal and ground.
The Marquee is 1/8″ Plexiglas, a few strips of 12v LED lights (like you can get on a roll pretty cheap from Amazon), and an aluminum foil wrapped cardboard backer. Marquee retainers are made from strips of 1/2″ aluminum angle cut to width and painted with Rustoleum black hammer finish paint.
Power starts at a little 4 outlet power strip. The 60-in-1 board, marquee lights, and coin mechanism all run off a little power brick with molex output (like an old computer disk drive). The speakers and monitor plug into the strip directly. Because this is running the 60-in-1 board instead of an actual computer, I can just power up/down from the main switch without worrying about safe shutdown or data corruption.

The Controls
Control panel is going to be a ball top joystick gated to 4-Way and three action buttons (plus the player start and freeplay coin buttons). My original control panel (The one in all the pictures… will be updated once I finish) had six action buttons, but I realized after installing everything that that didn’t really make sense. Most of the classic games maxed out at 3 buttons, 2 players meant taking turns, modern games that require 6 buttons are usually (always?) simultaneous play (and there’s no way I’m squeezing two sets of six button controls into this little 18″ panel). All the controls are wired up to a JAMMA connector, so I could technically swap out the 60-in-1 for an actual arcade board… but that probably won’t happen.
Artwork
All the artwork is cheap and easy 24×36 poster prints from Costco. I found the Galaga graphics online and just scaled them to fit. The marquee looks a little washed out, but pretty good when back lit. The side art and kick-plate look good and should hold up fine (nobody better be kicking this masterpiece!). The control panel graphics didnt hold up so well to my testing- after a few hours of play a lot of the ink had been rubbed off along the lower edge. Replaced the control panel graphic and covered with 1/8″ plexi, used a heat gun to bend it over the front edge.
One thing to watch out for- Costco’s online photo setup will automatically scale your photos to match your print size. So if you have an 18 inch control panel graphic oriented horizontally it’ll stretch it out to 24 inches so it fills the whole width. Use your photo editor to set the 20×30 canvas size and then place your images on that.